How To Heat And Melt Hard Wax Bens Without A Warmer?

Contents
Hard waxing beads a pretty useless unless they’re melted, and melting them doesn’t take a huge amount of skill, to be honest. You do need to know what you’re doing, though and follow a few safety guidelines when using wax. If you aren’t ready to invest in a good wax warmer kit just yet, there are two other options to melt your waxing beans that won’t cost you a cent. Both are pretty effective and are done by using warmers that most likely you both have at home. They will help you avoid some of the most common waxing mistakes too!

How to melt waxing beans on the stove?
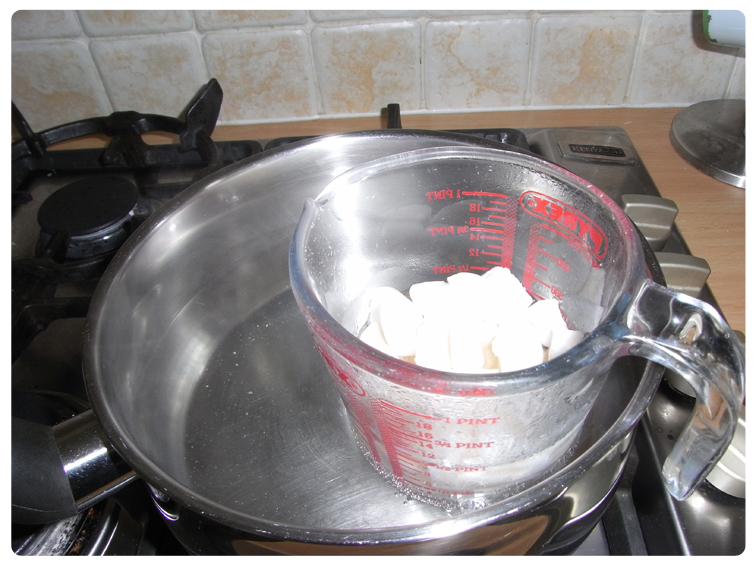
This is the most traditional method of melting waxing beads and can be incredibly effective if it’s done correctly. Most people put the hard wax beans straight into the pot to melt but this doesn’t lead to even heat distribution and let’s be honest – it will ruin your pot. The best way to melt your hard wax beads on the stove is the double boiler method.
Of course, the first thing would be to have an actual double boiler, but if you don’t, the following is just as good:

- You will need a medium to a large sized pot for the water. You will also need smaller pot or glass bowl that fits inside of it and will be able to hold all of the waxing beads that you need.
- Take the medium-sized pot and fill it with water to the halfway mark. Make sure not to fill it more than this as it might overflow, creating a huge mess in the process.
- Place it on the stove and turn the heat to medium leaving the water to come to a gentle boil. If it starts to boil quite aggressively, turn the heat down a bit and wait for it to cool slightly.
- Once it is boiling, place the smaller pot or glass bowl on top of the bottom pot so that it is slightly above the water.
- Place the waxing beans into the bowl or smaller pot, the steam from the boiling water will heat up the wax and melt it.
- Stir the beads while it melts to heat up the process
It is very important to keep an eye on the temperature of your stove so that your wax doesn’t start to boil. If your wax does boil it will be a lot less effective so make sure to prevent it from getting too hot. Most waxes reach a melting point around 60 degrees Celsius, which translates to about 140 degrees Fahrenheit.
If you aren’t too keen on the stove route, not to worry, there is another method that is also super easy and uses an appliance that is most probably sitting in your kitchen as well.
How to heat hard wax beans in the microwave?
Unlike the stove method, using the microwave is quite a bit faster but also makes a whole lot less mess which is always a plus. You do still need to keep an eye on your wax to make sure that you don’t over melt it or reach a boiling point, but if you follow the steps below you shouldn’t have any problems.
Before you begin, make sure to turn the wattage of your microwave down, most are set at 100% power by default. Ideally, you want to bring it all the way down to 20%. If you don’t change the wattage, the microwave will basically nuke your wax instead of slowly heating it up so it melts.
- Pour your wax beads into a microwave safe bowl and put it in the microwave. Be sure not to cover it with anything, not even cling film.
- Put the microwave on for 10 seconds, once it’s done give your wax a stir and put it back in for another 10 seconds
- Repeat this process until your wax has melted to a honey-like consistency.
If you are going to use one of these two methods, you do need to remember that you may need to warm your wax up one or two more times while you are busy with your waxing as the wax will start to cool down and solidify. Which brings us to the next point…
What is the best way to melt wax at home?
As much as this article is supposed to be about ways to heat hard wax beads without a warmer, the truth is that using a dedicated wax warmer really is the best way to heat wax without a question.
Why?
Because most companies supply their own dedicated wax warmers they test them to make sure it works correctly with their own waxing brand. They run tests and guarantee 100% compatibility between the wax and the warmer.
Although the stove and the microwave work just fine, nothing can compare to the efficacy of a proper wax warmer. It distributes the heat evenly and at the perfect temperature too meaning your wax will be as effective as it can possibly be.
Using a warmer is also a lot more convenient; as mentioned earlier in this article.
If you use a stove or microwave, once you start to wax, your waxing mix will start to cool down and solidify again which means that you will have to melt it again. All that getting up and down will cause your waxing to take much longer than it would with a wax warmer. With a warmer, it stays right next to you while you wax at the perfect temperature.
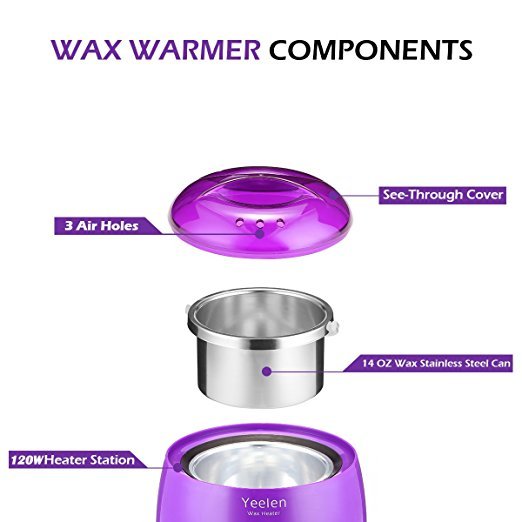
You’ve probably noticed but there are a ton of wax warmers on the market and all of them sound as good as the other. Our personal favorite is the Yeelen Hot Wax Warmer. It takes only about 8 minutes to melt the beads, which makes life so much easier if you are in a hurry. This wax warmer also has an adjustable temperature gauge so if you are using different waxes, you can change the temperature accordingly.

The actual material of the wax warmer is an ABS quality meaning that it is non-flammable. It means that not only it is much safer than the stove method, but the actual warmer won’t get damaged by the heat. Best of all, the Yellen wax warmer comes in a super snazzy purple color.
To choose the best wax for hair removal please visit my blog and you’ll see all my testing and comparisons here.
Although a dedicated wax warmer can involve a bit more in terms of a financial investment, the advantages of using it make buying one so much worth it. You will get the best results from your hard wax beads and enjoy smooth, hair-free days for longer.
If you discovered a new waxing technique or if you want to share your hot waxing story, please do get in touch in the comments below.
